> ## Documentation Index
> Fetch the complete documentation index at: https://docs.deribit.com/llms.txt
> Use this file to discover all available pages before exploring further.
# Creating and Assigning a Member
> Create a Starbase Member on the main account and assign every subaccount that will trade before you generate API keys.
A **Member** is the Starbase trading participant. You cannot create a Starbase API key, authenticate to a gateway, or receive a rate-limit allocation until the target account belongs to an active Member.
Do this **before** [Creating a Starbase API Key](/starbase/creating-api-key). If you skip it, key creation usually fails with **"No active member"**, and the subaccount cannot authenticate to Starbase.
Members are configured on the **main account only**. Subaccounts cannot create or manage Members. Switch into the main-account UID in the Account Panel (or authenticate as the main account over the [classic JSON-RPC API](/articles/json-rpc-overview)) before you continue.
The [Starbase section](https://www.deribit.com/account/BTC/starbase/api-keys) is only visible after your account has been authorized by a Deribit admin. If you do not see the section, contact your Account Manager or [support@deribit.com](mailto:support@deribit.com).
A Member groups one or more **portfolios** (main account and/or subaccounts) into a single trading participant. See [Account Model](/starbase/account-model) for the concepts, rate-limit sharing, and margin-mode constraints.
## Who must belong to a Member
Add every main-account or subaccount UID that will trade on Starbase. A subaccount left outside every Member can still use the standard Deribit APIs, but it cannot authenticate to Starbase.
Most clients can configure only **one Member**. Add every UID that needs Starbase access to that Member. Broker clients that require separate Members for independent end clients must contact [support@deribit.com](mailto:support@deribit.com) to have multi-Member access enabled. The panel may display an option to add another Member even when the account is not enabled to save it.
## Front-end interface
Open the [**Starbase section**](https://www.deribit.com/account/BTC/starbase/api-keys) of the Account Panel while logged in as the **main account**. The Starbase section is separate from the standard **API** section.
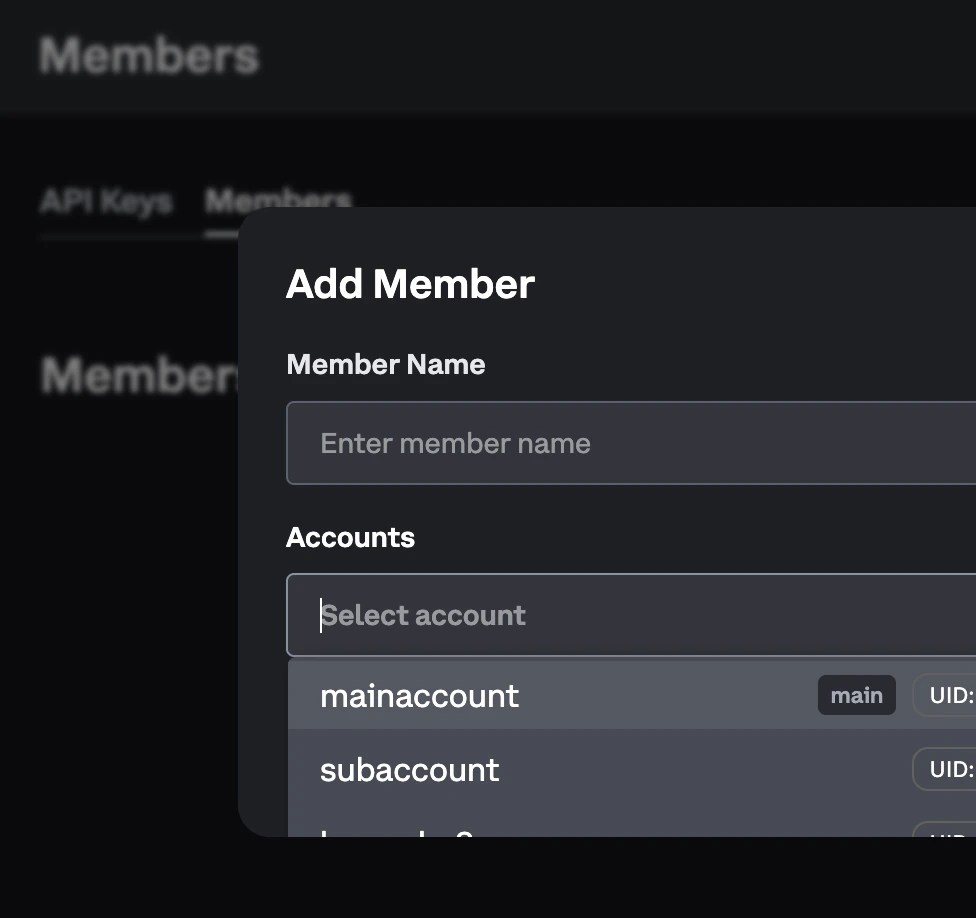
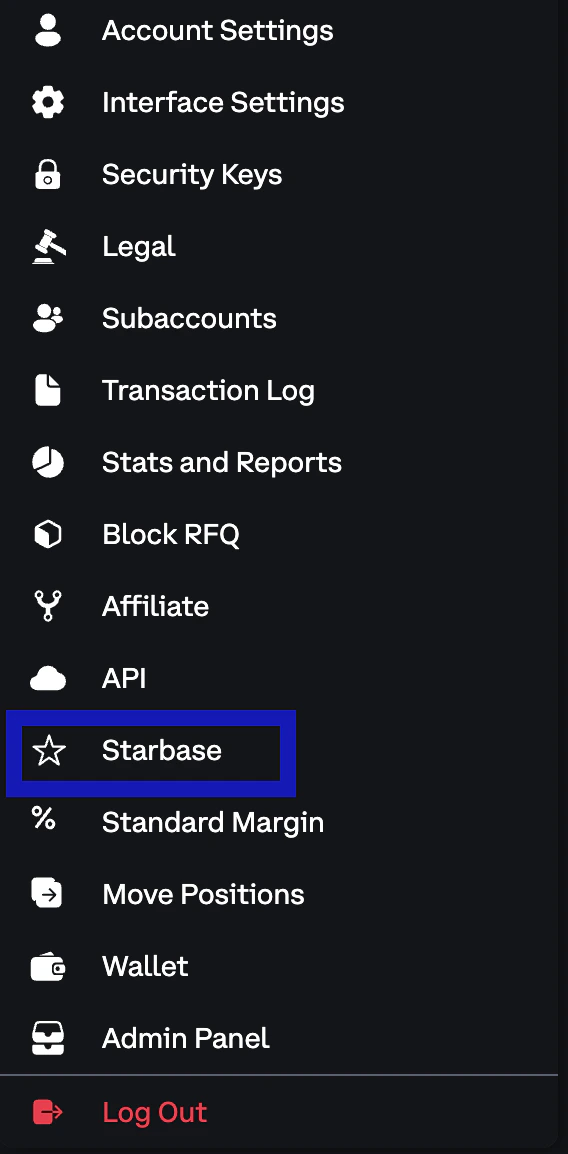 Click **Add Member** and fill in:
* **Member Name**: a label for this Member (for example `Primary`)
* **Accounts**: select every main-account and/or subaccount UID that should trade on Starbase
Click **Add Member** and fill in:
* **Member Name**: a label for this Member (for example `Primary`)
* **Accounts**: select every main-account and/or subaccount UID that should trade on Starbase
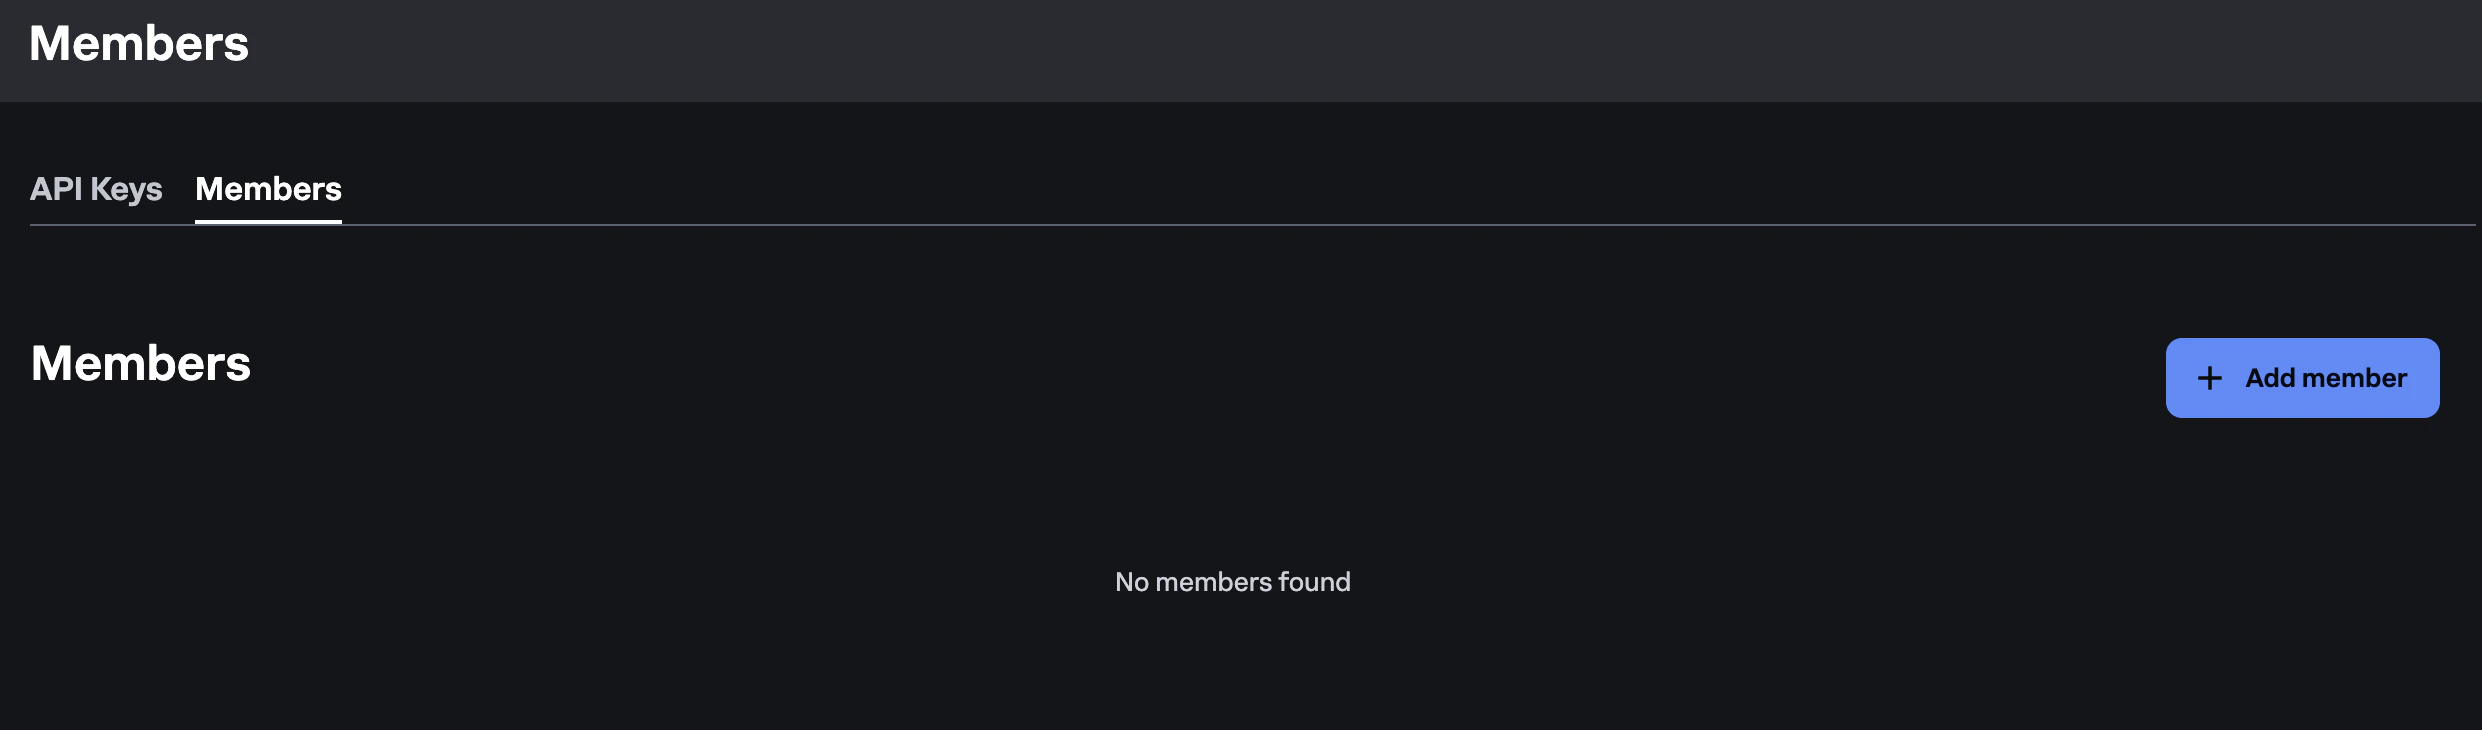 Click **Add Member** to open the dialog:
 Once saved, the Member appears in the Starbase member list.
If a subaccount was created after the Member, or was omitted from the first save, edit the Member and add its UID. API key creation is scoped to the Member that the current account belongs to, so assign the account before you create a key for that UID.
**"No active member" error**: Key creation fails if the target account does not belong to an active Member. Add the account to a Member first, then create the key while switched into the **subaccount UID** that will use it.
## Create and assign a Member via API
Authorized main accounts can manage Members with the [classic JSON-RPC API](/articles/json-rpc-overview). Creating, updating, or deleting a Member requires `account:read_write`, main-account authentication, and Direct Access trading to be enabled. Listing Members requires `account:read`.
Omit `member_id` to create a Member. `accounts` must be a non-empty list of UIDs:
```json theme={null}
{
"jsonrpc": "2.0",
"id": 59,
"method": "private/set_member",
"params": {
"name": "Primary",
"accounts": [12345, 67890]
}
}
```
To assign additional UIDs later, send the existing `member_id` with the **full** replacement `accounts` list. Omitting `accounts` on an edit clears the Member's accounts:
```json theme={null}
{
"jsonrpc": "2.0",
"id": 60,
"method": "private/set_member",
"params": {
"member_id": 195,
"name": "Primary",
"accounts": [12345, 67890, 11111]
}
}
```
Confirm the result with [`private/get_members`](/api-reference/account-management/private-get_members). See also [`private/set_member`](/api-reference/account-management/private-set_member) and [`private/delete_member`](/api-reference/account-management/private-delete_member).
Toggling `is_active` cannot be combined with a `name` or `accounts` change in the same request. A pure active-state toggle must resend the Member's current `name` and `accounts`. A Member cannot be created inactive.
## Next steps
Create keys on each assigned subaccount after the Member exists
How Members, portfolios, rate limits, and margin modes relate
Continue from Member setup through gateway validation
Confirm Member assignment before the order-entry go-live
## Related topics
- [Creating a Starbase API Key](/starbase/creating-api-key.md)
- [Starbase API Overview](/starbase/overview.md)
- [Account Model](/starbase/account-model.md)
- [Starbase Connectivity Quickstart](/starbase/quickstart.md)
- [Production Readiness Checklist](/starbase/production-readiness-checklist.md)
Once saved, the Member appears in the Starbase member list.
If a subaccount was created after the Member, or was omitted from the first save, edit the Member and add its UID. API key creation is scoped to the Member that the current account belongs to, so assign the account before you create a key for that UID.
**"No active member" error**: Key creation fails if the target account does not belong to an active Member. Add the account to a Member first, then create the key while switched into the **subaccount UID** that will use it.
## Create and assign a Member via API
Authorized main accounts can manage Members with the [classic JSON-RPC API](/articles/json-rpc-overview). Creating, updating, or deleting a Member requires `account:read_write`, main-account authentication, and Direct Access trading to be enabled. Listing Members requires `account:read`.
Omit `member_id` to create a Member. `accounts` must be a non-empty list of UIDs:
```json theme={null}
{
"jsonrpc": "2.0",
"id": 59,
"method": "private/set_member",
"params": {
"name": "Primary",
"accounts": [12345, 67890]
}
}
```
To assign additional UIDs later, send the existing `member_id` with the **full** replacement `accounts` list. Omitting `accounts` on an edit clears the Member's accounts:
```json theme={null}
{
"jsonrpc": "2.0",
"id": 60,
"method": "private/set_member",
"params": {
"member_id": 195,
"name": "Primary",
"accounts": [12345, 67890, 11111]
}
}
```
Confirm the result with [`private/get_members`](/api-reference/account-management/private-get_members). See also [`private/set_member`](/api-reference/account-management/private-set_member) and [`private/delete_member`](/api-reference/account-management/private-delete_member).
Toggling `is_active` cannot be combined with a `name` or `accounts` change in the same request. A pure active-state toggle must resend the Member's current `name` and `accounts`. A Member cannot be created inactive.
## Next steps
Create keys on each assigned subaccount after the Member exists
How Members, portfolios, rate limits, and margin modes relate
Continue from Member setup through gateway validation
Confirm Member assignment before the order-entry go-live
## Related topics
- [Creating a Starbase API Key](/starbase/creating-api-key.md)
- [Starbase API Overview](/starbase/overview.md)
- [Account Model](/starbase/account-model.md)
- [Starbase Connectivity Quickstart](/starbase/quickstart.md)
- [Production Readiness Checklist](/starbase/production-readiness-checklist.md)